
Klaviyo Integration
Shopify Storefront data and cart logic is bound to your Webflow elements through Shopyflow attributes. Connecting your Webflow site to Shopify is done by adding custom attributes to your Webflow elements.
Yet, you are not required to type or edit attributes manually. Shopyflow provides you with the pre-configured components needed to create your store, as copyable Webflow elements right in Webflow designer.
All the copyable Shopyflow Components are native editable Webflow elements. There is no layout or styling limitation on any element.
In the below image hover your mouse on the hotspots to see all the required Shopyflow attributes to build a product page like this in Webflow

Klaviyo helps e-commerce businesses send personalized and targeted email campaigns that drive sales and build customer loyalty. It integrates smoothly with Shopify, making it easier to automate email marketing and create meaningful customer connections.
This guide assumes you have added your Klaviyo tracking code to your Webflow site. If you haven't done so, please follow this guide to find out how to get your Klaviyo code snippet.
Klaviyo Dashboard Settings
Go to Klaviyo Dashboard to create a private API key following these steps:
- Click on your profile name at the left bottom and go to Settings.
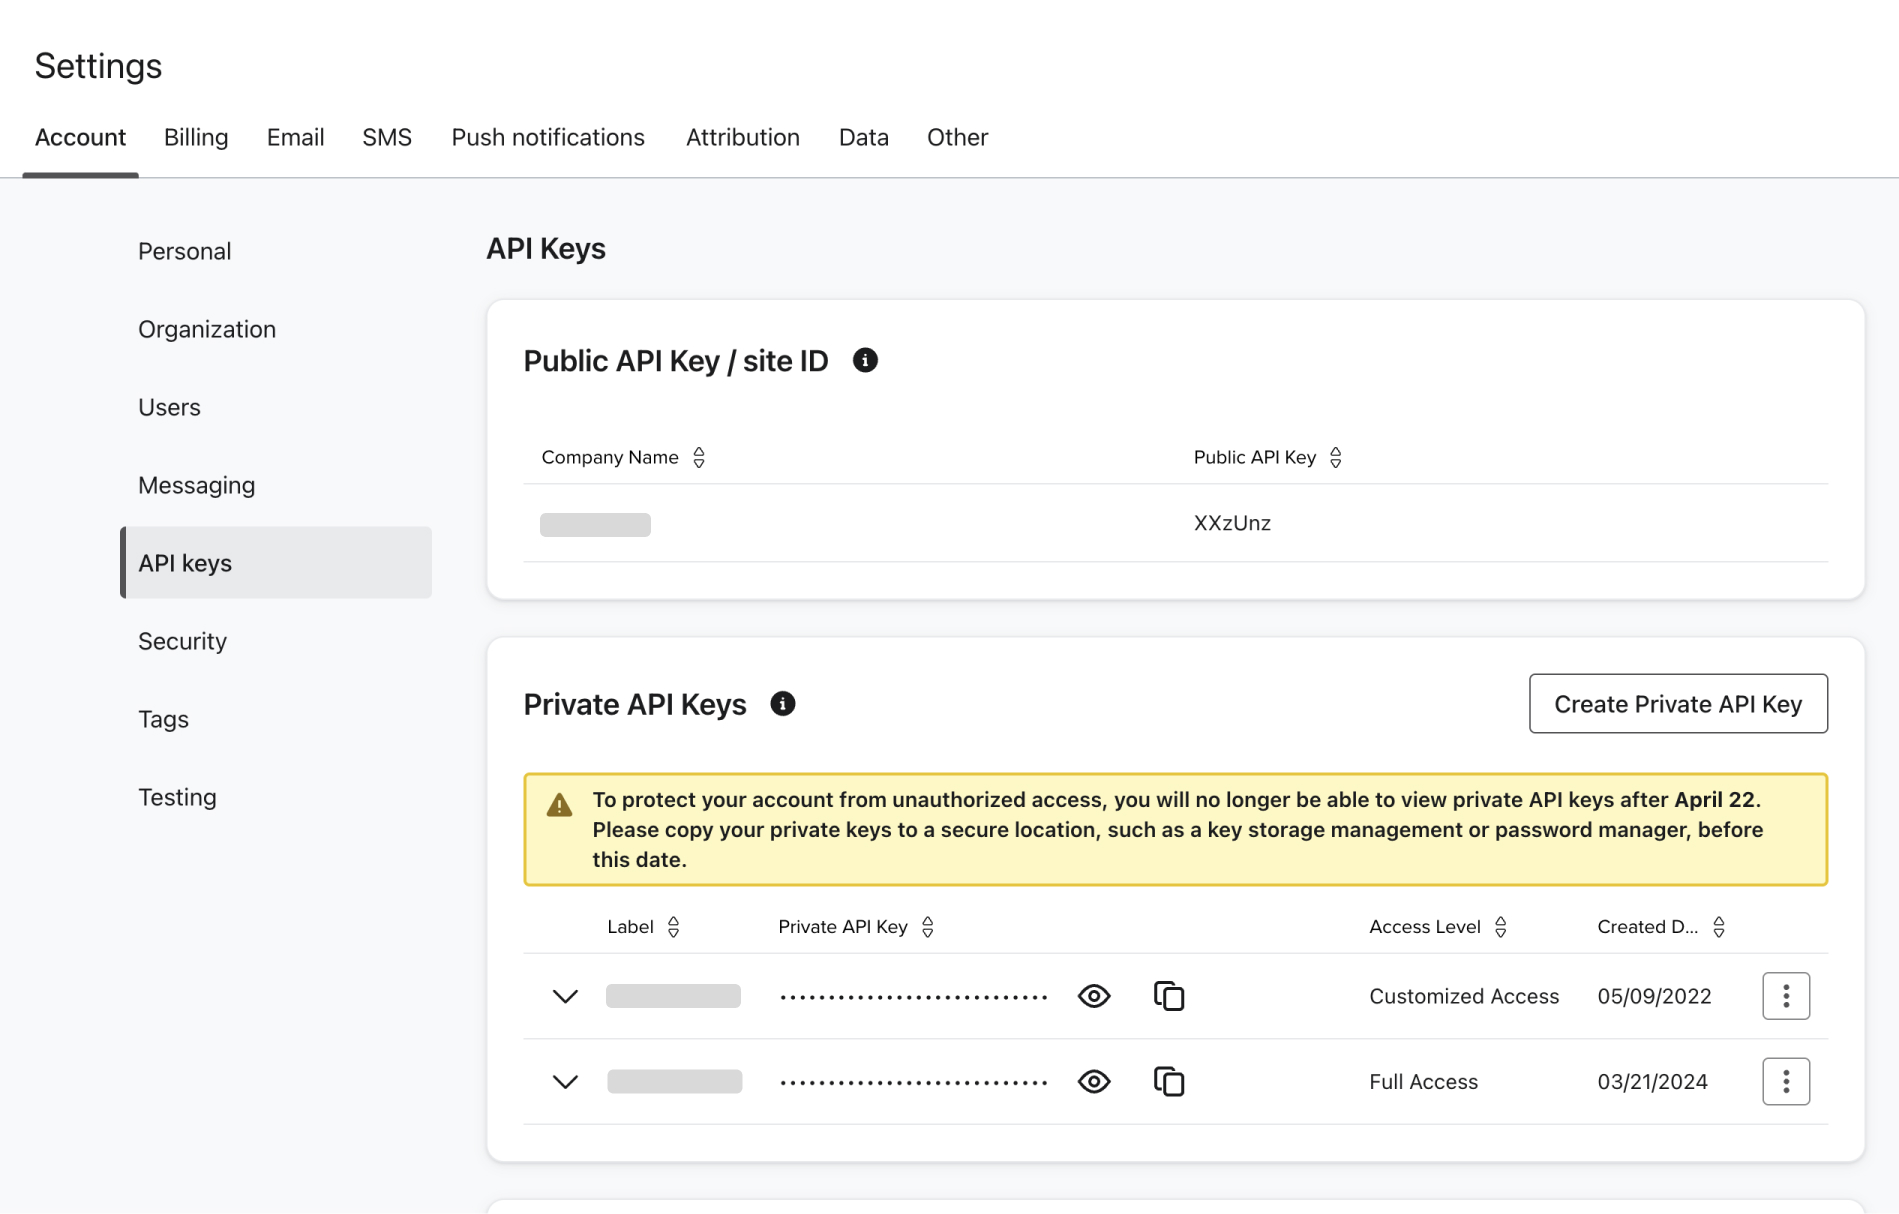
- In Account tab click API keys and note your Public API Key.
- Paste this code snippet to your site settings into the head code. Replace the PUBLIC_API_KEY with your own public api key.
<script type="text/javascript" async="" src="https://static.klaviyo.com/onsite/js/PUBLIC_API_KEY/klaviyo.js"></script>- In Account tab click API keys and click on Create Private API Key button.
- In the API scopes, choose full access for Profiles, Lists and Subscriptions.
- Click create and copy your API key in the next page.
- Go to Shopyflow Webflow App > Installation > Advanced Tracking and enable Klaviyo. Enter your API key and save.
- Publish your site.
Add a Klaviyo form to your site
Use a native Klaviyo form or get Shopyflow's Klaviyo Form component from the component library.
If you are using the Shopyflow components, select the form submit button in Webflow Designer and change the sf-klaviyo-list-id attribute's value to the Klaviyo list ID you would like to subscribe your users to. e.g. sf-klaviyo-list-id="cefjyz"
Profile Properties
With a native Shopyflow form you can create a profile in Klaviyo with the following properties:
- First name
- Last name
- Phone number
If you want to save additional properties in a Klaviyo profile, you can use sf-klaviyo-prop="{PROPERTY NAME}" attribute on an input field, textarea or checkbox.
Consent
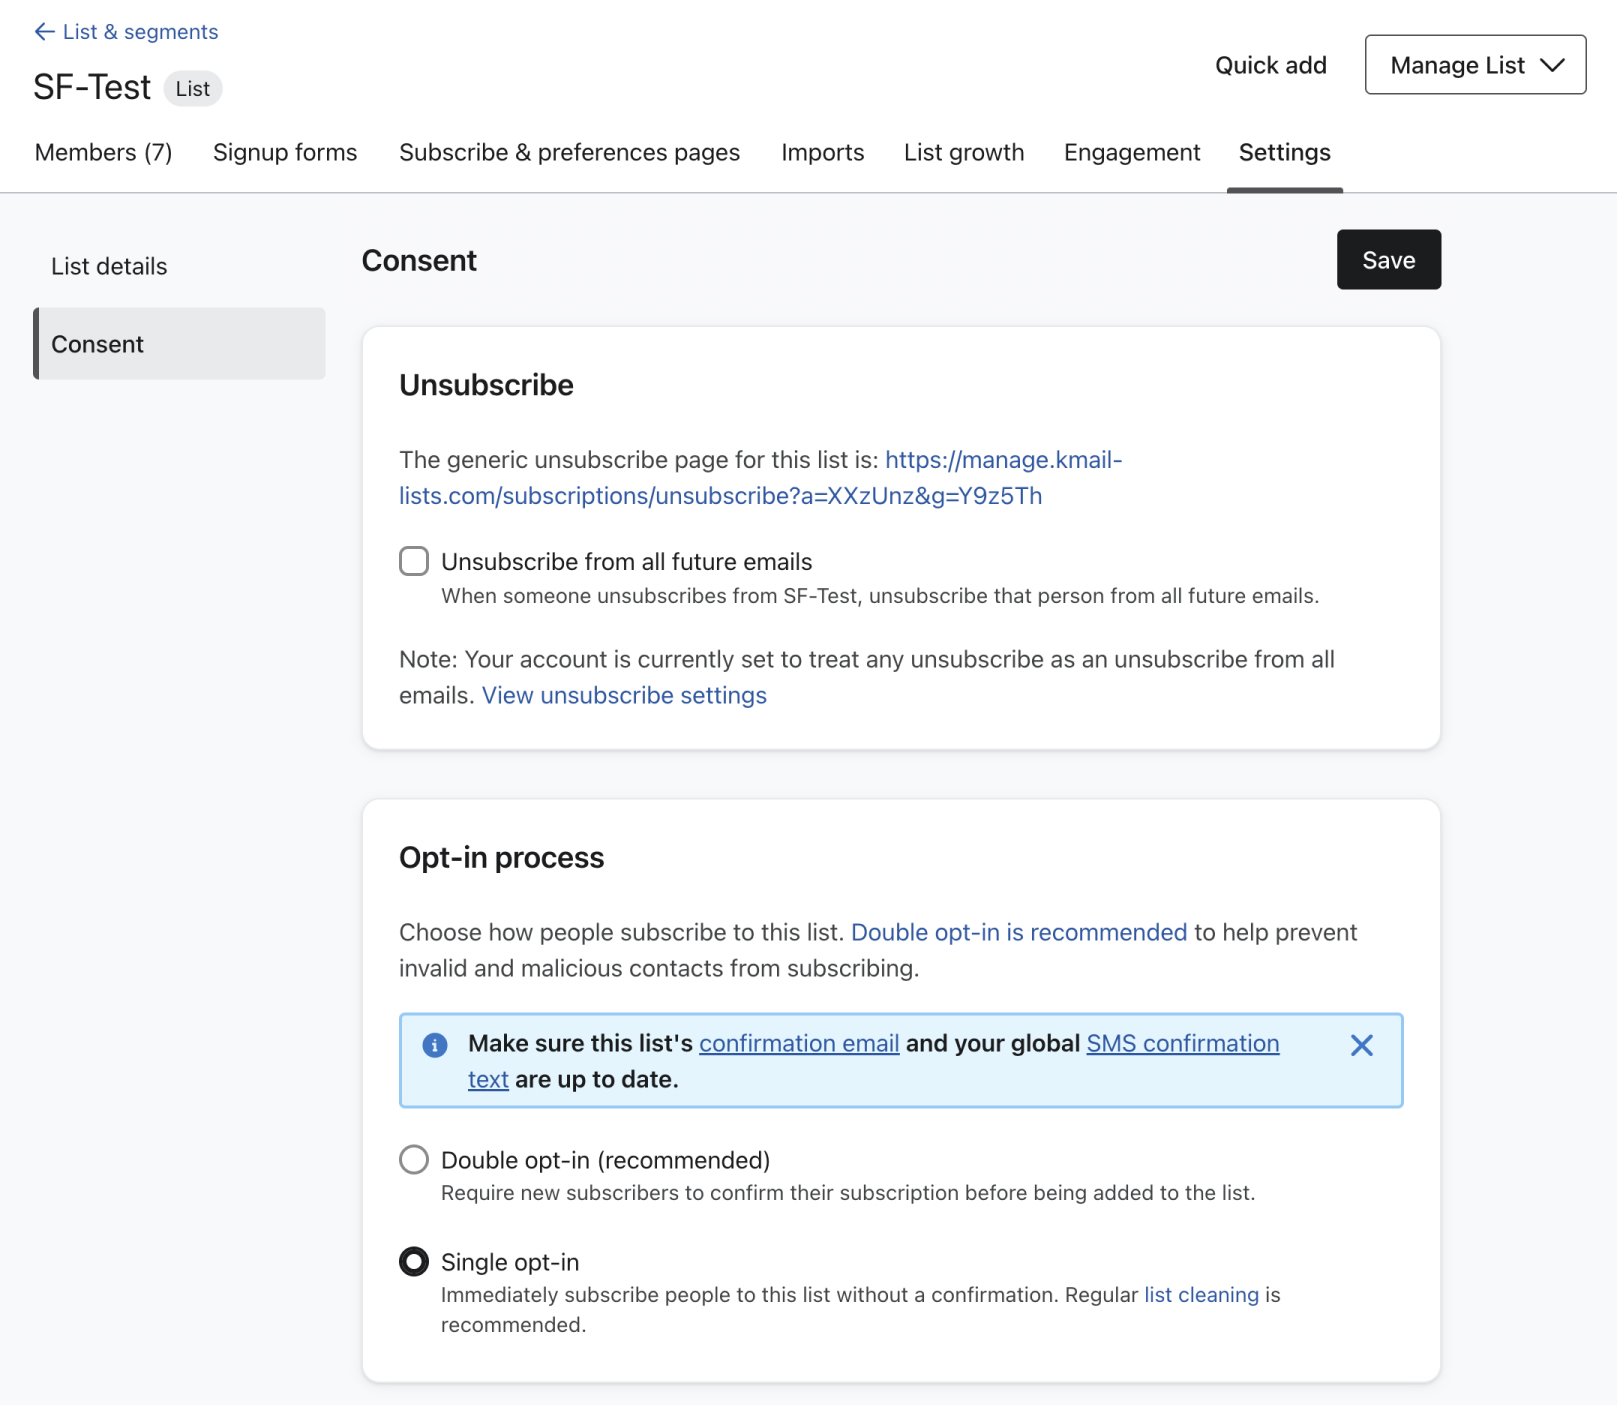
Finally you need to enable single-opt in in the Klaviyo list settings. If this is not set up, you can not add your customers to any Klaviyo list.
- Go to your Klaviyo Dashboard > List & Segments
- Click on the list you want to use.
- In Settings tab click Consent and choose single-opt in as shown below.
Click here to learn more about the Klaviyo lists.
Klaviyo tracking can start only after a customer explicitly gives consent. Consent is given automatically if you use an email capture form. Moreover you can get consent using the consent checkbox in Shopify checkout or via the checkbox in Customer Account Sign Up Form.
Once your setup is complete, Shopyflow will start tracking the following Klaviyo e-commerce events:
- Viewed Product
- Added to Cart
- Removed from Cart
- Started Checkout (via Shopify in checkout)
- Completed Purchase (via Shopify in checkout)
Once customer gives consent and Shopyflow starts tracking, you will be able to create Klaviyo flows via your Klaviyo dashboard.
Back in Stock alerts
Storesynk's Klaviyo Back in Stock Form lets shoppers subscribe to a restock alert for an out-of-stock variant. When a shopper submits the form, Storesynk submits a back-in-stock subscription against the selected variant in your Klaviyo catalog. Klaviyo then sends the alert when the variant is restocked, through a Back in Stock flow.
Two pieces are needed: the form on your site to collect subscribers, and a live Back in Stock flow in Klaviyo to send the notification.
1. Sync your catalog and add the form
Make sure the Klaviyo app for Shopify is installed and your catalogue is synced, so your product variants exist in Klaviyo. Then add the Klaviyo Back in Stock Form component inside your Buy Module — the email field is required, everything else is optional.
2. Create the Back in Stock flow in Klaviyo
A subscription only collects the shopper; the actual alert is sent by a Klaviyo flow. Follow Klaviyo's Create a back in stock flow guide:
- Install the Klaviyo app for Shopify and sync your catalogue.
- In Klaviyo, go to Flows > Create Flow and search the template library for "Back in Stock" (or open the existing flow if you already have one).
- Confirm the flow's trigger is the Back in Stock metric/event.
- Add or confirm the email (and SMS, if you use it).
- Flip the status from Draft to Live (top-right of the flow editor).
Once the flow is live, subscribers from your Back in Stock Form will automatically be notified when their selected variant is back in stock.
Webflow app usage
Webflow app settings
Inner components
Module contents
Available methods
Integration
contents
State management
Related Utilities
